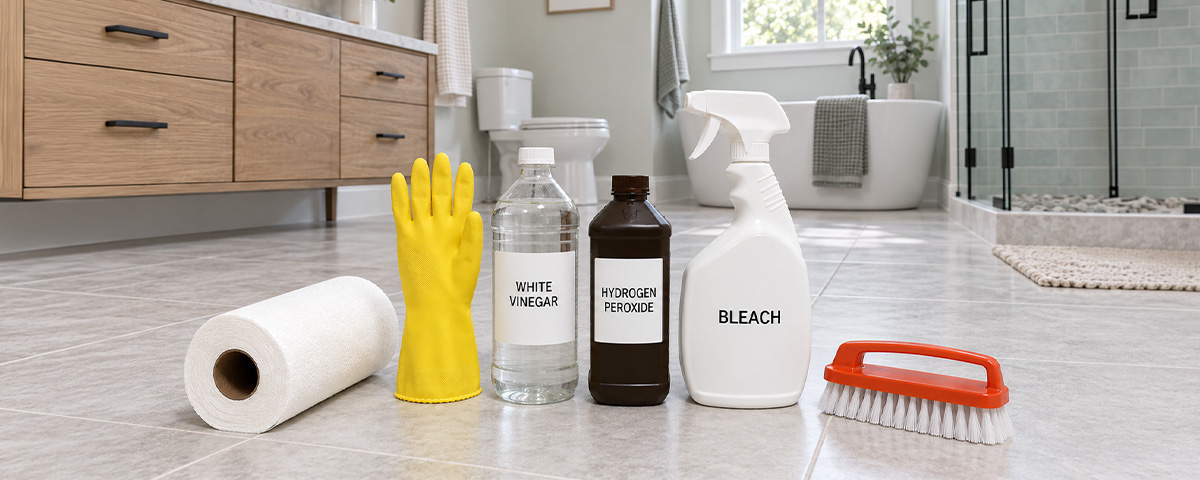
To get rid of mold in the bathroom, identify the surface first. Apply 3% hydrogen peroxide to non-porous surfaces like glazed tile, floor tile, and painted walls. Allow at least 15 minutes of contact time, keeping the surface visibly wet; scrub firmly with a stiff brush, rinse thoroughly, and dry completely. On porous surfaces like grout, no household cleaner fully penetrates below the surface. If mold returns in the same spot within two weeks of correct cleaning, the problem has gone deeper than surface treatment can reach.
Mold in the bathroom can happen everywhere. A slow drip under the sink, condensation behind the toilet, a clogged exhaust vent, or water sitting on the bathroom floor can all create mold problems in spots people don’t clean as often or notice right away.
This guide covers how to get rid of mold on every bathroom surface outside the shower: floor tiles, walls, ceiling, sink, and toilet. Each surface gets the right approach for what it actually is, not a one-size-fits-all spray and wipe. For shower-specific mold removal, our guide on Getting Rid of Shower Mold covers every shower surface in detail.
Not sure if what you are seeing is mold or mildew? Our guide on Mold vs. Mildew in the Shower helps you tell them apart before you start cleaning. If you know it is mold but are not sure what type you are dealing with, our guide to common bathroom mold types compares black, green, brown, and pink growth by appearance, texture, and common location.
Key Takeaways
- Bathroom mold appears in more locations than most people check: floor grout, sink drain, toilet tank, ceiling, under sink cabinet, and exhaust vent.
- Pre-rinse bathroom floor tile before applying any cleaner. Foot traffic residue reduces cleaning effectiveness.
- The sink overflow channel is one of the most common hidden sources of bathroom mold odor. It is almost never cleaned during routine maintenance.
- Bathroom ceiling mold is almost always a ventilation problem before it is a cleaning problem.
- Bleach cannot penetrate porous grout and degrades the grout binder with repeated use. Use on non-porous surfaces only.
- A musty smell that returns after cleaning all visible surfaces means mold is hiding somewhere you have not found yet.
- Fixing the moisture source is what stops mold from coming back. Cleaning alone is not enough.
Bathroom Mold Cleaning Overview
| Surface | Best Cleaner | Dwell Time | Avoid |
|---|---|---|---|
| Bathroom floor tile – glazed (light mold) | 3% hydrogen peroxide for active surface mold on glazed tile and grout lines. | 3% hydrogen peroxide: about 10 minutes, max 15 minutes on colored or unsealed grout. | Abrasive pads, steel wool, and acidic or oxidizing cleaners on natural stone. |
| Bathroom floor tile – glazed (heavy mold) | For heavier mold on the non-porous tile surface, use diluted bleach (1:10). | Bleach or disinfectant: follow the label contact time. | Repeated vinegar use on cement grout, bleach as a regular grout cleaner. |
| Bathroom ceiling (painted) | Undiluted 3% hydrogen peroxide applied with a cloth, not sprayed. | At least 10 min dwell time; wipe and dry. | Bleach; direct spray; flat or matte paint without spot test. |
| Bathroom sink basin and faucet | 3% hydrogen peroxide for surface mold on the basin; standard bathroom cleaner for faucet finishes. | 3% hydrogen peroxide: about 10 minutes while keeping the surface damp. | Bleach on chrome or specialty finishes; prolonged vinegar contact on metal; mixing cleaners. |
| Bathroom overflow drain | For overflow odor or buildup, use vinegar carefully only if the sink/faucet material allows it. | Vinegar in overflow: about 15 to 30 minutes, then flush thoroughly with water. | Using undiluted bleach or chemical products that can damage plumbing, and degrade rubber components. |
| Under sink cabinet (light mold) | Fix the leak first. For small surface mold on sealed or painted cabinet surfaces, use 3% hydrogen peroxide. | About 10 minutes, wipe, rinse if needed, and dry completely. | Soaking particleboard, MDF, or raw wood; ignoring swollen or soft that may need replacement. |
| Bathroom floor tile (natural stone) | pH-neutral stone-safe cleaner only. | Per product label.Avoid soaking the stone. | Vinegar, hydrogen peroxide, bleach, any acid or oxidizing cleaner. |
| Toilet bowl and tank | Toilet bowl cleaner or diluted bleach (1:10) | Per product label. | Mixing cleaning products. |
| Bathroom exhaust vent | Standard bathroom cleaner on vent cover; vacuum grille and fan blades. | N/A | Cleaning vent without addressing undersized or blocked fan. |
| Mold smell without visible source | Clean all fabric items, drains, and hard surfaces systematically. | Per surface and product. | Air fresheners as a substitute for finding and cleaning the source. |
Disclaimer: Cleaning Safety and Product Guidelines Before You Start
Before using any cleaner on a bathroom surface, take a moment to read these safety guidelines.
They apply to every cleaning method in this article. Always follow the product label, test a small hidden area first, and use any cleaner at your own risk.
Use bleach, vinegar, and hydrogen peroxide occasionally, not as regular cleaners.
Repeated use of bleach, vinegar, and hydrogen peroxide on grout and porous surfaces causes cumulative damage over time. These products are appropriate for occasional mold and mildew treatment, not routine weekly cleaning.
Always follow the manufacturer’s instructions first. Contact time, dilution, and surface compatibility can vary from one product to another.
Use the label as your main guide. General cleaning advice is helpful, but the product label is what tells you how that specific cleaner should be used.
Always test on a hidden area first.
Materials vary. A product that works safely on one surface can discolor, etch, or degrade another. Apply any cleaner to a small hidden area and wait 24 hours before using it on a visible surface.
Never mix cleaning products; use only one cleaning product at a time.
Never mix bleach with vinegar, hydrogen peroxide, ammonia, or any other cleaner.
- Bleach + hydrogen peroxide: can cause rapid release of oxygen gas, which may create vigorous bubbling, splashing, and pressure in a closed container
- Bleach + vinegar: can release toxic chlorine gas
- Bleach + ammonia: can release toxic chloramine gas
- Vinegar + hydrogen peroxide combined in the same container: can form peracetic acid, a corrosive chemical that can irritate or injure the eyes, skin, and respiratory tract
These combinations produce fumes that are harmful when inhaled.
For stubborn mold or growth that keeps coming back, contact a certified professional.
If cleaning does not resolve the problem or the same spot returns within two weeks, the issue has gone deeper than surface cleaning can reach.
How Do You Get Rid Of Mold In The Bathroom
To get rid of mold in the bathroom, identify the surface first. Apply undiluted 3% hydrogen peroxide to non-porous surfaces like glazed tile, bathroom floor tile, and painted walls. Allow at least 10 minutes of contact time keeping the surface visibly wet, scrub firmly then scrub with a stiff nylon toothbrush or non-abrasive scrub brush, rinse thoroughly, and dry completely. For porous surfaces like grout, no household cleaner fully penetrates below the surface. If mold returns in the same spot within two weeks of correct cleaning, the problem has gone deeper than surface treatment can reach.
The bathroom has more mold-prone surfaces than most people check regularly. Floor tile, ceiling, sink, and toilet all accumulate mold in different ways and need slightly different approaches. This guide covers each one. For shower-specific mold removal, our guide on Getting Rid of Shower Mold covers every shower surface in detail.
Before choosing a cleaner, identify whether the mold is sitting on the surface or embedded below it. Surface mold wipes off cleanly and does not return quickly. Embedded mold resists wiping, leaves staining after cleaning, and returns within two weeks. The approach is different for each.
How to Get Rid of Mold in the Bathroom
These steps apply to all bathroom surfaces covered in this guide. Surface-specific product recommendations follow in the sections below.
Materials, Tools, and Supplies
- 3% hydrogen peroxide (undiluted) for most bathroom surfaces
- Borax solution (1 cup per gallon warm water) for repeated floor grout cleaning
- Diluted bleach (1 part bleach to 10 parts water) for non-porous surfaces only as a secondary option
- Spray bottle or applicator
- Stiff-bristled grout brush or toothbrush for grout lines
- Soft-bristled brush for acrylic, fiberglass, and delicate surfaces
- Clean cloths or paper towels
- Protective gloves
- Safety glasses
- N95 mask rated for mold spores
- Exhaust fan running or window open before you start
Step 1: Ventilate the bathroom
Before you spray or apply anything, turn on the exhaust fan or open a window. Keep it running the whole time you clean, then leave it on for at least 20 minutes afterward.
This helps air out the bathroom and clear away cleaning fumes and mold spores that may get stirred up while you scrub.
Step 2: Identify the surface and choose the right cleaner
Before you apply anything, make sure you know what surface you’re cleaning. What works on glazed tile may not be the best choice for grout, painted walls, or ceilings.
Check the surface-specific sections before you apply anything.
As a general rule, 3% hydrogen peroxide is a good option for many non-porous bathroom surfaces. For floor grout that needs regular cleaning, a borax solution is usually the gentler choice.
Diluted bleach should be more of a backup, and only for non-porous surfaces. Avoid using it on colored grout, natural stone, or painted ceilings.
Step 3: Apply the cleaner
Use enough cleaner to keep the surface wet while it works. A quick spray usually isn’t enough when you’re dealing with mold.
If you’re cleaning a wall, caulk line, or another vertical spot where the cleaner keeps running down, press a cleaner-soaked paper towel against the area. That keeps the product in contact with the surface long enough to do its job.
Step 4: Allow the full contact time
For 3% hydrogen peroxide, allow at least 10 minutes on most surfaces. Do not exceed 15 minutes on colored or unsealed grout. For diluted bleach and EPA-registered disinfectants, follow the product label contact time exactly. Do not wipe or rinse during this step.
Step 5: Scrub firmly
Don’t use the same brush on every surface. Grout can handle more pressure, so use a stiff nylon toothbrush or non-abrasive grout brush and scrub in small circles.
Acrylic and fiberglass scratch easily. Use a soft-bristled brush there. Painted walls and ceilings need the gentlest touch, usually a soft cloth or sponge with light pressure.
Avoid wire brushes, steel wool, and abrasive pads. They can scratch the finish, rough up grout, or leave damage behind after the mold is gone.
Step 6: Rinse thoroughly
Remove all cleaner residue and loosened mold debris with clean water. For painted ceilings and walls, wipe with a clean, damp cloth rather than rinsing directly to avoid soaking the painted surface.
Step 7: Dry completely
Dry every surface immediately after rinsing with a clean cloth. Leaving moisture behind after cleaning recreates the exact conditions that allowed mold to establish in the first place.
⚠️ Important: Use only one cleaning product at a time. Never mix bleach with vinegar, hydrogen peroxide, or ammonia. Mixing bleach with vinegar or hydrogen peroxide produces toxic chlorine gas or peracetic acid. Mixing bleach with ammonia produces toxic chloramine gas. All are harmful when inhaled.
Pro tip: Mold outside the shower usually means moisture is hanging around somewhere.
Ceiling corners, floor edges, and spots behind fixtures can stay damp because they don’t get much airflow and are easy to miss during routine cleaning. If mold returns to the same area within two weeks, there’s probably a drip, condensation, or ventilation problem keeping that spot wet.
Fix the moisture first. Otherwise, cleaning only gives you a short break before the mold comes back.
Mold In Bathroom Sink
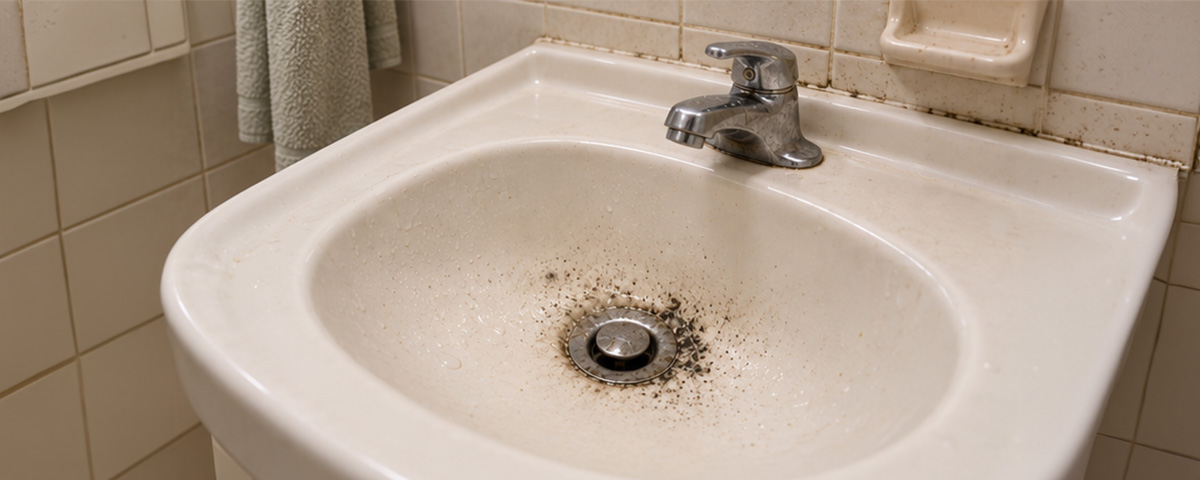
Bathroom sink mold appears in the spots that stay wet the longest between uses: around the drain opening, at the faucet base where water pools after every use, along the caulk or sealant where the sink meets the countertop, and inside the overflow channel, the small hole near the top of the sink basin that prevents overflow. The overflow channel is the most commonly missed location. It stays perpetually damp, accumulates organic residue, and is rarely cleaned during routine sink maintenance.
For black mold specifically in the bathroom sink, including mold under the sink cabinet and inside the sink drain, our guide on Black Mold in the Bathroom covers each location in detail including the under-sink storage risk and the overflow channel cleaning approach.
If the buildup around the drain is pink or orange-pink and feels smooth or slimy rather than fuzzy, compare it with pink mold in the bathroom, which is usually bacterial biofilm rather than fungal mold.
How To Clean Mold From Bathroom Sink
To clean mold from a bathroom sink, apply undiluted 3% hydrogen peroxide to the affected surfaces, including the drain opening, faucet base, and caulk seam; allow at least 10 minutes of contact time, keeping the surface visibly wet; scrub firmly with an old toothbrush; rinse thoroughly; and dry completely.
⚠️ Not recommended for natural stone sink surrounds or specialty fixture finishes without a hidden area spot test first. Avoid prolonged bleach contact on chrome faucets as it can pit and dull the finish.
Disclaimer: Use these cleaning methods occasionally and at your own risk. Always follow manufacturer instructions. Test on a hidden area first. For stubborn mold or recurring growth, contact a certified professional.
Materials, Tools, and Supplies You’ll Need
- 3% hydrogen peroxide (undiluted)
- Spray bottle or applicator
- Old toothbrush for drain opening and faucet base
- Bottle brush or flexible cleaning brush for overflow channel
- Clean cloth or paper towels
- Protective gloves
- Safety glasses
- Exhaust fan running or window open before you start
Step 1: Ventilate and pre-rinse
Turn on the exhaust fan or open a window. Rinse the sink basin with warm water to remove loose soap scum and surface residue before applying any cleaner.
Step 2: Apply hydrogen peroxide to all affected surfaces
Apply undiluted 3% hydrogen peroxide to the drain opening, faucet base, caulk seam, and any visible mold on the sink basin.
Use enough to keep the area visibly wet while it sits. A light mist usually isn’t enough; the peroxide needs steady contact with the mold to work properly.
Step 3: Address the overflow channel
Pour undiluted white vinegar or 3% hydrogen peroxide directly into the overflow opening, then let it sit for at least 30 minutes. After that, flush the channel well with hot water.
Don’t push brushes, cloths, or tools into the overflow channel. The opening is narrow, and anything that gets stuck in there can turn into a bigger problem.
Let the liquid do the work. If needed, repeat the treatment two or three times, flushing with hot water each time. That’s safer and usually more effective than trying to scrub inside the channel.
Step 4: Let it dwell
Give the hydrogen peroxide at least 10 minutes of contact time on the sink surface. The area should stay visibly wet while it works.
Around the faucet base or caulk seam, the liquid may run off too quickly. For those spots, soak a folded paper towel in hydrogen peroxide and press it against the area during the dwell time.
Step 5: Scrub, rinse, and dry
Scrub around the drain opening, faucet base, and caulk seam with an old toothbrush. Use firm pressure, especially in the tight edges where buildup tends to sit.
Rinse everything well with clean water, then dry it right away. If you leave the area damp after cleaning, mold has a much easier path back.
⚠️ Important: Use only one cleaning product at a time. Never mix bleach with vinegar, hydrogen peroxide, or ammonia. All combinations produce toxic fumes harmful when inhaled.
Pro tip: The faucet aerator, the small mesh screen at the tip of the spout, accumulates mineral deposits and biofilm that can harbor mold and bacteria. You can unscrew it from most faucets by hand or with a simple wrench. Soak it in undiluted white vinegar for 30 minutes to dissolve mineral deposits, scrub with an old toothbrush, rinse thoroughly, and reattach. If the aerator is the source of contamination, cleaning the sink basin without addressing it means water flowing through a contaminated spout partially undermines the cleaning effort.
Bathroom Floor Mold
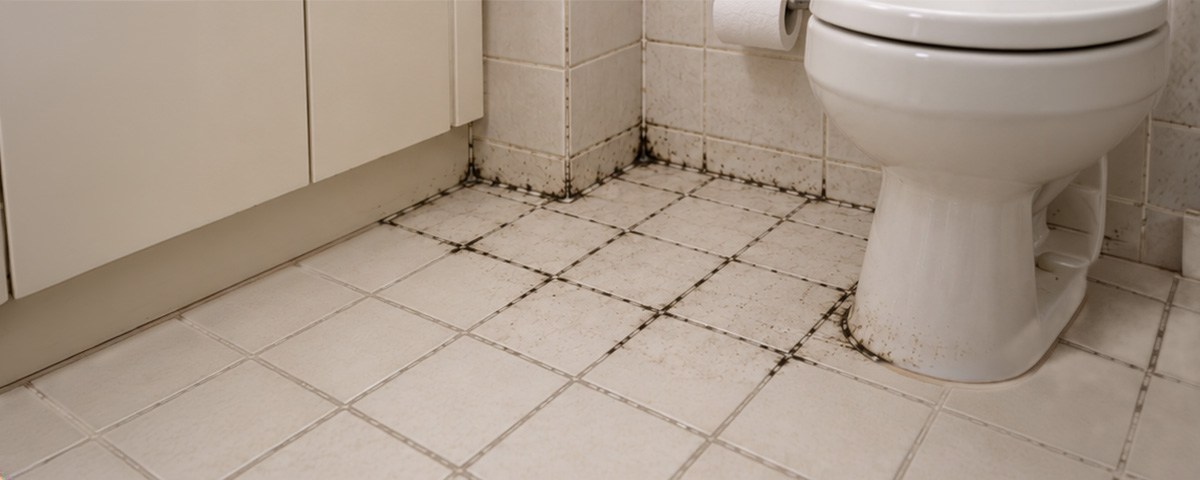
Bathroom floor mold usually shows up in the spots that stay damp and don’t get much airflow. Check the grout lines between tiles, the caulk where the floor meets the wall, the area around the toilet base, and underneath bath mats. These spots can hold moisture longer than the rest of the floor. Floor tile also picks up more foot traffic residue, soap film, and standing water than bathroom walls. That’s why floor grout often shows mold sooner and keeps coming back more stubbornly than grout on vertical tile.
If the discoloration is tan, olive-brown, or dark brown and keeps returning after cleaning, our guide to brown mold in the bathroom explains how fungal growth can differ from aging grout, soap buildup, and ordinary floor staining.
How To Clean Mold From Bathroom Floor
To clean mold from a bathroom floor, apply undiluted 3% hydrogen peroxide or borax solution to the affected grout lines and tile surface, allow the full dwell time, keeping the surface visibly wet, scrub grout lines firmly with a stiff-bristled brush, rinse thoroughly, and dry completely. Pre-rinse the floor with warm water before applying any cleaner to remove foot traffic residue and soap film that would otherwise reduce the cleaner’s direct contact with the mold.
⚠️ Not recommended for natural stone tile floors, unsealed grout, or colored grout without a hidden area spot test first. Hydrogen peroxide can discolor or lighten some grout colors with extended contact beyond 15 minutes. Borax is not recommended on natural stone.
Disclaimer: Use these cleaning methods occasionally and at your own risk. Always follow manufacturer instructions. Test on a hidden area first. For stubborn or recurring mold, contact a certified professional.
Materials, Tools, and Supplies You’ll Need
Option A: Hydrogen peroxide method
- 3% hydrogen peroxide (undiluted)
- Baking soda for heavier buildup
- Small mixing bowl for paste
- Spray bottle
Option B: Borax solution method
- 1 cup borax
- 1 gallon warm water
- Mixing container
- Spray bottle or applicator
Both methods require:
- Stiff-bristled grout brush or toothbrush
- Scrub brush for tile surface
- Clean cloth or paper towels
- Protective gloves
- Safety glasses
- Exhaust fan running or window open before you start
Step 1: Ventilate and pre-rinse
Turn on the exhaust fan or open a window. Remove bath mats and any items on the floor. Rinse the floor with warm water to remove loose soap scum and foot traffic residue before applying any cleaner.
Step 2: Apply your chosen cleaner
For hydrogen peroxide: Spray undiluted 3% hydrogen peroxide directly onto affected grout lines and tile surface. Work in sections so the product does not dry before the dwell time is complete. For heavier buildup, apply baking soda paste to grout lines after the hydrogen peroxide dwell time for additional scrubbing support.
For borax solution: Mix one cup of borax into one gallon of warm water until fully dissolved. Apply directly to grout lines and tile surface using a spray bottle or cloth. Keep the surface visibly wet.
Step 3: Let it dwell
For hydrogen peroxide: Allow 10 minutes of dwell time. Do not extend beyond 15 minutes on colored or unsealed grout. Keep the surface visibly wet throughout.
For borax solution: Allow 15 to 20 minutes. Borax does not degrade the cement grout binder, making it a safer choice for regular floor grout cleaning than repeated vinegar use.
Step 4: Scrub, rinse, and dry
Scrub grout lines firmly with a stiff-bristled brush using small circular strokes. Scrub the tile surface to remove mold growing on residue. Rinse the floor thoroughly with clean water. Dry completely with a clean cloth or allow to air dry with the exhaust fan running.
⚠️ Important: Use only one cleaning product at a time. Never mix bleach with vinegar, hydrogen peroxide, or ammonia. All combinations produce toxic fumes harmful when inhaled.
Pro tip: Bathroom floor grout is one of the spots where borax consistently outperforms vinegar as a regular maintenance cleaner. Vinegar’s acidity gradually breaks down cement grout binders with repeated use. Borax can be a good option for floor grout because it cleans well, helps slow mold from coming back, and is gentler on grout than repeated vinegar use.
If the grout still looks discolored after proper cleaning and full drying, the mold may have moved below the surface. At that point, surface cleaning may not be enough.
That is where Mint Condition’s IICRC-certified tile and grout cleaning technicians make the difference, addressing mold at the grout level where surface products cannot reach. Learn more about our professional tile and grout cleaning service.
Vinegar Bathroom Mold
Vinegar is one of the most common natural cleaners people reach for when they see surface mold in the bathroom.
It can be useful in the right situation, but it’s important to know what vinegar actually does, where it works best, and when the problem may need something stronger.
How To Clean Bathroom Mold With Vinegar
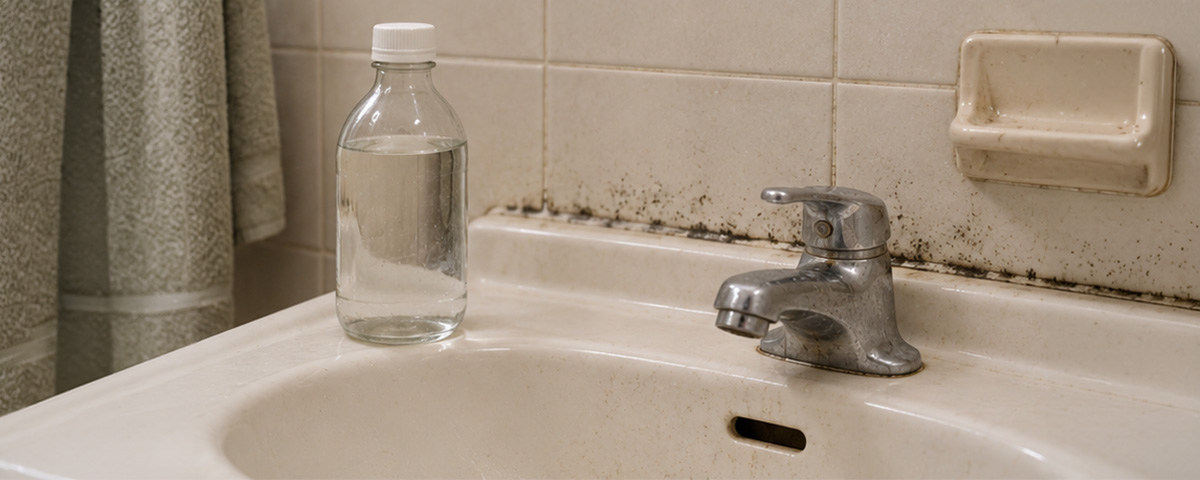
To clean bathroom mold with vinegar, use it only on non-porous surfaces like glazed tile, glass, or chrome fixtures.
Apply undiluted white vinegar directly to the affected area and let it sit for 30 to 60 minutes. Then scrub the spot firmly, rinse it well, and dry the surface completely.
Vinegar can be useful for early-stage surface mold on glazed tile, glass, and chrome fixtures. But it is not the best choice for established mold, repeated cleaning on cement grout, or any natural stone surface.
What does vinegar do to mold?
Vinegar’s acetic acid creates an acidic environment that disrupts the growth of some fungal species. A 2015 peer-reviewed study published in the International Journal of Environmental Research and Public Health found that vinegar at 4 to 4.2% acetic acid inhibited Penicillium chrysogenum but showed no inhibitory effect on Aspergillus fumigatus, another extremely common indoor mold species. Aspergillus is also one of the molds commonly associated with green bathroom growth, so if the affected area is blue-green, olive, or dark green, our guide to green mold in the bathroom can help you identify what you are seeing before choosing a treatment. It is not an EPA-registered mold killer and its effectiveness varies significantly by mold species.
Where vinegar works in the bathroom:
- Light surface mildew on glazed tile and glass: reasonable first option. If the growth has been confirmed as mildew rather than mold, our guide to cleaning mildew in the shower covers the appropriate methods for tile, grout, and shower curtains.
- Chrome and standard fixture surfaces: light mildew and mineral deposit loosening
- Plastic shower curtain and liner: surface mildew as a first option
- Overflow channel in bathroom sink: pour undiluted into opening, allow 30 minutes, flush with hot water
Where vinegar should not be used:
- Natural stone including marble, travertine, limestone, and granite: permanently etches and dulls the surface
- Cement grout as a regular cleaner: gradually degrades the calcium carbonate binder over time
- Established or recurring mold: not reliable enough as a standalone treatment
⚠️ Do not combine vinegar and hydrogen peroxide on the same surface at the same time. Together they form peracetic acid which can irritate skin, eyes, nose, throat, and lungs. Choose one product and complete the full process before considering the other.
Pro tip: If you clean bathroom mold with vinegar and the same dark growth comes back within two weeks, vinegar probably isn’t the right tool for that spot.
This is especially true with grout lines. Once mold has taken hold, vinegar may reduce what you see on the surface, but it often won’t reach the deeper problem.
For surface treatment, 3% hydrogen peroxide may be a better option. If the mold has moved below the surface of the grout, professional tile and grout cleaning may be needed.
Vinegar works best for light maintenance on the right surfaces, not for mold that keeps coming back after proper cleaning and drying.
Mold on Tile Floor
Bathroom tile floors are exposed to the same moisture, residue, and humidity as shower walls, but they get less attention during routine cleaning. Here is what you need to know about mold on tile floors specifically.
Can Mold Grow On Tile
Yes, mold can grow on bathroom tile. Glazed ceramic and porcelain tile are non-porous, which means mold cannot root into the tile material itself the way it does in grout or caulk. However, mold can still grow on top of glazed tile surfaces when soap scum, body oils, dust, or other organic residue accumulate and provide a food source. The tile surface is not the problem. The residue on it is.
Mold tends to show up in the same tile trouble spots again and again:
Grout lines: Grout is porous and soaks up moisture, which makes it the most common place for mold to grow on tiled surfaces.
Caulk seams: Caulk can hold moisture, especially where the wall meets the floor or tub. Once it starts to soften, crack, or pull away, mold has an easier place to settle in.
Tile surface: Mold can grow on top of soap scum and residue sitting on glazed tile, but it does not grow into the tile itself. Keeping the tile clean and free of buildup lowers the risk.
Behind the tile: If grout cracks or caulk fails, water can get behind the tile. From there, mold can grow on drywall, backer board, or adhesive where you cannot see it from the surface.
The practical takeaway: if you are seeing dark growth on your bathroom floor tile, the grout lines and caulk bead where the floor meets the wall are the first places to check. Growth on the tile face itself is almost always sitting on top of residue rather than rooted into the tile material.
How To Get Rid Of Mold On Bathroom Tiles
To remove mold from bathroom tile floors, apply 3% hydrogen peroxide directly to the grout lines and any affected glazed tile. Keep the area damp for about 10 minutes, then scrub the grout with a stiff nylon toothbrush or non-abrasive grout brush.
Wipe the tile surface clean, rinse everything well, and dry the floor completely.
A borax solution can be a gentler follow-up cleaner once the visible mold is gone, especially for ongoing maintenance.
⚠️ Not recommended for natural stone tile floors, unsealed grout, or colored grout without a hidden area spot test first. Hydrogen peroxide can discolor or lighten some grout colors and specialty finishes, particularly with extended contact time beyond 15 minutes. Borax is not recommended on natural stone surfaces.
Materials, Tools, and Supplies You’ll Need
Option A: Hydrogen peroxide method
- 3% hydrogen peroxide (undiluted)
- Baking soda for heavier buildup
- Small mixing bowl for paste
- Spray bottle
Option B: Borax solution method
- 1 cup borax
- 1 gallon warm water
- Mixing container
- Spray bottle or applicator
Both methods require:
- Stiff-bristled grout brush or toothbrush
- Scrub brush for tile surface
- Clean cloth or paper towels
- Protective gloves
- Safety glasses
- Exhaust fan running or window open before you start
Step 1: Ventilate and pre-rinse
Turn on the exhaust fan or open a window. Remove any bath mats or items on the floor. Rinse the floor with warm water to remove loose soap scum and surface residue before applying any cleaner. This step is more important on bathroom floors than on shower walls because floor surfaces accumulate significantly more foot traffic debris and residue between cleanings.
Step 2: Apply your chosen cleaner
For hydrogen peroxide:
Spray undiluted 3% hydrogen peroxide directly onto the affected grout lines and tile surface. Apply enough to keep the surface visibly wet. Work in sections rather than treating the entire floor at once so the product does not dry before the dwell time is complete. For heavier buildup, mix baking soda with just enough water to form a thick paste and apply it onto the grout lines after the hydrogen peroxide dwell time for additional scrubbing support.
For borax solution:
Mix one cup of borax into one gallon of warm water and stir until fully dissolved. Apply directly to the grout lines and tile surface using a spray bottle or cloth. Apply enough to keep the surface visibly wet. Borax is particularly suited for bathroom floor grout where repeated cleaning is needed, as it does not degrade the cement grout binder the way repeated vinegar use does.
Step 3: Let it dwell
For hydrogen peroxide:
Allow 10 minutes of dwell time. Do not extend beyond 15 minutes on grout surfaces, as prolonged contact can lighten some grout colors and finishes. Keep the surface visibly wet throughout. If it dries before 10 minutes, reapply to the affected area.
For borax solution:
Allow 15 to 20 minutes of dwell time. Unlike vinegar, borax does not degrade the cement grout binder, making it a safer choice for regular floor grout cleaning.
Step 4: Scrub, rinse, and dry.
Scrub grout lines firmly with a stiff-bristled grout brush or toothbrush using small circular strokes. Scrub the tile surface with a scrub brush to remove any mold or residue. Rinse the floor thoroughly with clean water to remove all cleaner and loosened debris. Dry the floor completely with a clean cloth or allow it to air dry with the exhaust fan running. Do not leave the floor wet after cleaning.
How To Remove Mold From Bathroom Tiles Naturally
To remove mold from bathroom tiles naturally, start with undiluted 3% hydrogen peroxide. It’s a lower-fume, non-bleach option that works well on glazed tile surfaces and grout lines.
Apply it to the affected area and let it sit for about 10 minutes, keeping the surface damp while it works. Then scrub the grout with a stiff nylon toothbrush or non-abrasive grout brush, rinse everything well, and dry the area completely.
For ongoing floor grout maintenance, a borax solution can be a better long-term option than vinegar. Mix one cup of borax with one gallon of warm water. It’s gentler on grout than repeated vinegar use and can help keep mold from coming back as quickly.
Vinegar gets recommended a lot as a natural cleaner for tile mold, but its effectiveness is more limited than most sources suggest
One peer-reviewed 2015 study found that vinegar with 4% to 4.2% acetic acid did not stop the growth of Aspergillus fumigatus, one of the common indoor mold species.
For established mold, or for repeated cleaning on cement grout, 3% hydrogen peroxide or a borax solution is usually a better choice.
Per the Rogawansamy et al. 2015 study, hydrogen peroxide and borax solution are the most defensible natural options for bathroom tile mold based on available evidence. Neither fully penetrates deeply embedded grout mold, but both address surface and near-surface growth effectively when applied correctly.
How To Clean Mold Off Bathroom Ceiling
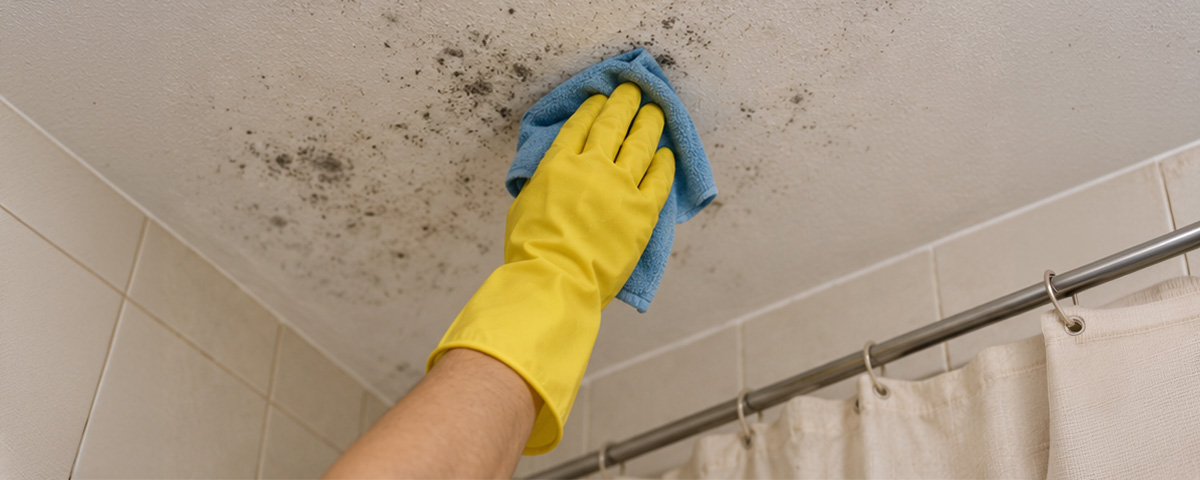
To get rid of mold on a bathroom ceiling, apply undiluted 3% hydrogen peroxide to the affected area using a cloth rather than spraying directly, allow at least 10 minutes of dwell time keeping the surface visibly wet, wipe firmly with a clean damp cloth, and dry completely. Always work with the exhaust fan running and protect your eyes from overhead dripping.
Ceiling mold is one of the most overlooked spots in the bathroom and one of the most telling signs that ventilation is not doing its job. Here is what to look for and how to address it.
How To Remove Mold From Bathroom Ceiling Without Bleach
To remove mold from a bathroom ceiling without bleach, use undiluted 3% hydrogen peroxide. Apply it to a cloth or sponge first, then gently wipe the affected area. Let it sit for at least 10 minutes, then wipe the ceiling with a damp cloth and follow right away with a dry cloth.
Don’t spray hydrogen peroxide directly onto the ceiling. Applying it with a cloth gives you better control, helps prevent dripping, and keeps the product from sitting unevenly on the paint.
Ceiling mold is usually a steam problem. Once the existing ceiling mold has been cleaned, our guide on how to prevent mold and mildew in the shower explains how ventilation, humidity control, and drying habits help keep the same moisture problem from bringing it back.
Hot showers fill the bathroom with humid air. That air rises, hits the cooler ceiling, and can leave moisture behind.
If the room doesn’t dry out fast enough, mold can start to grow there. The first signs are usually dark spots, fuzzy patches, or stubborn staining near the exhaust fan, in the corners, or along the ceiling-wall line.
⚠️ Not recommended for unpainted drywall, popcorn ceilings, or textured surfaces without professional assessment first. Hydrogen peroxide can discolor some paint finishes, particularly flat or matte ceiling paint. Always test on a small hidden area before applying to the full surface.
Materials, Tools, and Supplies You’ll Need
- 3% hydrogen peroxide (undiluted)
- Clean sponge or soft cloth
- Old toothbrush for corner edges
- Clean dry cloth
- Plastic sheeting or old towels to protect the floor from drips
- Protective gloves
- Safety glasses
- N95 mask to avoid inhaling spores from overhead scrubbing
- Exhaust fan running before you start
Step 1: Protect yourself and the bathroom floor
Before you start, put on gloves, safety glasses, and an N95 mask. Ceiling cleaning is messy, and anything you loosen can fall right back down.
Cover the bathroom floor with plastic sheeting or old towels to catch drips. Keep the exhaust fan running the whole time to help move spores and cleaner fumes out of the room.
Step 2: Apply the cleaner
Pour undiluted 3% hydrogen peroxide onto a clean sponge or cloth rather than spraying directly at the ceiling. Wipe the affected area, making sure the surface stays visibly wet during the dwell time. For corner edges where the ceiling meets the wall, use an old toothbrush to work the cleaner into the joint.
Step 3: Let it dwell
Allow the hydrogen peroxide to sit on the ceiling surface for at least 10 minutes. Do not let it dry before wiping. If it dries before the dwell time is complete, reapply using the cloth rather than spraying directly.
Step 4: Wipe, rinse, and dry.
Wipe the ceiling firmly with a clean damp cloth to remove loosened mold and cleaner residue. Follow with a dry cloth to remove as much moisture as possible from the surface. Keep the exhaust fan running for at least 20 minutes after finishing to help the ceiling dry completely.
How To Get Rid Of Mold Smell In Bathroom
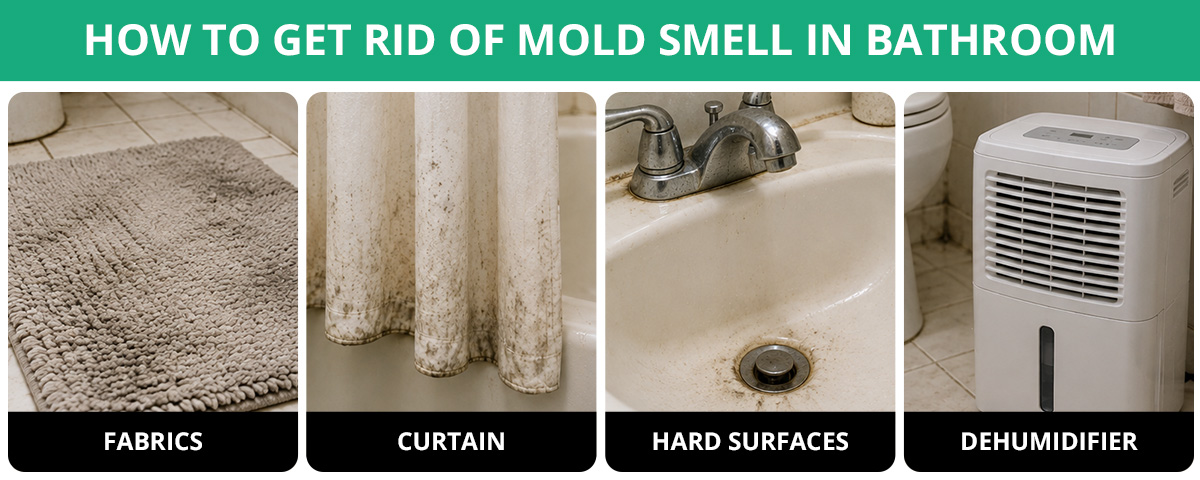
To get rid of mold smell in a bathroom, find and clean the mold source first. A musty bathroom odor does not go away by masking it with air fresheners or running the fan. The smell comes from microbial volatile organic compounds released by active mold growth. Eliminating the smell means eliminating the growth producing it.
Most common sources of bathroom mold smell
The most common hidden sources of bathroom mold smell are:
- inside the overflow channel of the sink
- inside the drain pipe below the drain cover
- on the underside of bath mats left damp between uses
- in grout lines that have embedded mold below the surface
- behind or under the toilet base where condensation accumulates unnoticed
Check these spots one by one before assuming the smell is coming from the mold you can see.
If you only clean the visible patch but miss the hidden source, you’ll end up right back where you started: the bathroom smells fine for a day or two, then the musty odor comes back.
Clean all fabric items first
Wash towels, bath mats, and fabric shower curtains that have been sitting damp. Machine wash on the warmest temperature the care label allows with regular laundry detergent. Add vinegar to the rinse cycle to help break down residue and surface mildew. For plastic or vinyl shower curtain liners that feel slimy or show staining that cleaning does not resolve, replacement is more cost-effective than repeated treatment.
Clean all hard surfaces
Apply undiluted 3% hydrogen peroxide to affected tile, grout, tub surfaces, and the sink basin. Allow at least 10 minutes of dwell time, scrub firmly, rinse thoroughly, and dry completely. For the full surface-specific cleaning process, refer to the relevant sections in this guide.
Control humidity after cleaning
Cleaning removes the mold you can see and helps get rid of the odor. Humidity control is what helps keep that smell from coming back.
The EPA recommends keeping indoor humidity between 30% and 50%, and the CDC recommends keeping it no higher than 50%. Run the exhaust fan during every shower and leave it on until the mirrors, walls, and other damp surfaces feel dry.
If the fan alone can’t clear the post-shower humidity, use a dehumidifier after showers to help bring the moisture level back down.
If the musty smell still lingers after you’ve cleaned every visible surface, checked the drains, and washed any damp fabrics, mold may be hiding somewhere you can’t see. Common spots include behind the toilet, under the sink cabinet, inside wall cavities near plumbing, or behind tile where grout or caulk has failed.
At that point, it’s better to get a professional assessment before doing more cleaning.
What Does Mold Smell Like In Bathroom
Bathroom mold usually has a musty, damp, earthy smell. Think of a wet basement, damp towels left overnight, or soil after it rains. The smell can be stronger or weaker depending on the type of mold, what it’s growing on, how wet the area is, and how much mold is present. But once you know that musty, earthy odor, it’s usually pretty easy to recognize.
Common descriptors from people who have encountered bathroom mold include:
- Damp and earthy: Like wet soil, a damp basement, or the air just before rain
- Stale or sour: Similar to wet laundry or gym clothes that never fully dried
- Musty and persistent: Unlike normal bathroom odors that clear with ventilation, mold odor tends to return quickly after the bathroom has been aired out
The most important signal is persistence. A mold smell that returns quickly after cleaning all visible surfaces and ventilating the bathroom indicates mold is present somewhere it has not been found yet.
For a full breakdown of what black mold specifically smells like and how to use smell as an identification tool, our guide on Black Mold in the Bathroom covers it in detail.
How To Get Rid Of Mold In The Bathroom FAQs
What Is The Best Product To Kill Mold In Bathroom?
For most bathroom surfaces, undiluted 3% hydrogen peroxide is the strongest practical starting point. It addresses surface mold on glazed tile, grout, caulk, painted walls, and tub surfaces, produces minimal fumes compared to bleach, leaves no chemical residue after it breaks down, and is safer for occasional grout use than bleach. For repeated grout maintenance cleaning, borax solution is the better long-term choice because it does not degrade the cement grout binder over time.
For a lower-toxicity commercial cleaner, look for products with the EPA Safer Choice label. These products have been reviewed for specific safety and environmental standards.
Still, always read the label before using anything. Commercial cleaners vary a lot, and not every product is safe for every bathroom surface.
Does Bleach Kill Bathroom Mold?
Yes, diluted bleach at 1 part bleach to 10 parts water kills surface mold on non-porous bathroom surfaces like glazed tile, glass, and tub surfaces when applied with the full contact time per the product label and the surface stays visibly wet throughout. On porous surfaces like cement grout, bleach cannot fully penetrate below the surface to reach mold embedded in the grout matrix. It removes the visible dark discoloration but leaves the growth below intact, which is why mold returns in the same grout lines after bleach treatment.
Surfaces to avoid bleach on in the bathroom:
- Natural stone: permanently damages the surface
- Colored grout: can lighten or strip grout color
- Chrome and metal fixture finishes: pits and dulls the finish
- Acrylic and fiberglass surfaces: causes yellowing and degradation
- Painted walls and ceiling: risk of paint discoloration
For most bathroom mold situations, 3% hydrogen peroxide is usually a more practical choice than bleach.
It can be used on more surfaces, gives off fewer fumes in a small bathroom, and is gentler on grout with repeated use. Bleach still has its place, but hydrogen peroxide is often the better starting point for routine bathroom mold cleaning.
How Do I Stop Mold Coming Back In My Bathroom?
To stop mold from coming back in your bathroom, you must completely kill the existing mold roots and control the room’s moisture levels, rather than focusing only on cleaning the visible growth.
Fix the moisture source first: Every recurring mold problem has a moisture driver. Cleaning without fixing the moisture source produces will bring mold back.
Take care of the surfaces mold uses to get deeper: Seal cement grout according to the manufacturer’s directions so it absorbs less moisture. Replace caulk when it feels soft, starts pulling away, or keeps staining after cleaning.
For the complete prevention guide covering daily habits, ventilation strategies, grout sealing, and dehumidifier use, our guide on How to Prevent Mold and Mildew in Shower covers everything in detail.
What Kills Mold Instantly In The Bathroom?
Nothing kills mold truly instantly. All effective mold treatments require a dwell time during which the product stays in contact with the mold surface to be effective. The fastest options available for bathroom surfaces are:
| Product | Minimum Effective Dwell Time | Best For |
|---|---|---|
| Diluted bleach (1:10) | Per product label; typically 5 to 10 minutes on non-porous surfaces | Glazed tile, glass, tub surfaces |
| 3% hydrogen peroxide | At least 10 minutes | Most bathroom surfaces including grout |
| EPA-registered disinfectant | Per product label; varies by product and target organism | Non-porous surfaces where verified kill rate is needed |
| Borax solution | 15 to 20 minutes | Cement grout maintenance cleaning |
Applying any of these and wiping immediately without the required dwell time is not an effective treatment. The contact time is not optional. It is what separates a treatment that works from one that only looks like it did.
The product label contact time is the authoritative source for each specific product. The surface must stay visibly wet for the full contact time. If it dries before the time is complete, reapply.
Conclusion
Bathroom mold doesn’t always stay in the obvious spots. It can show up in floor grout, sink drains, ceiling corners, toilet tanks, and under the sink cabinet.
The cleanup basics are the same: choose the right product for the surface, give it enough time to work, rinse thoroughly, and dry the area completely. The real difference is knowing where to look and checking those areas before the problem gets bigger.
If mold keeps returning to the same spot after proper cleaning, something is still keeping that area damp. Until that moisture source is fixed, the mold will keep coming back.
For more prevention tips, read our guide on How to Prevent Mold and Mildew in Shower. It walks through ventilation, humidity control, grout sealing, and the daily habits that help keep mold from returning.
Mold on bathroom tile and grout that keeps coming back is telling you the problem has moved below the surface. That is where Mint Condition comes in.
Mint Condition’s IICRC-certified tile and grout cleaning technicians address mold at the grout level using professional-grade methods that go beyond what household products can achieve. Eco-friendly, family- and pet-safe, serving Orlando and Central Florida.
Call us at (407) 456-2035 or fill out a contact form today for your free estimate.
References
IICRC S520 Standard for Professional Mold Remediation: https://www.iicrc.org/page/IICRCStandards
U.S. Environmental Protection Agency, A Brief Guide to Mold, Moisture, and Your Home: https://www.epa.gov/mold/brief-guide-mold-moisture-and-your-home
U.S. Environmental Protection Agency, Mold Course Chapter 2: https://www.epa.gov/mold/mold-course-chapter-2
U.S. Environmental Protection Agency, EPA Safer Choice Program: https://www.epa.gov/saferchoice
Centers for Disease Control and Prevention, Basic Facts About Mold and Dampness: https://www.cdc.gov/mold/faqs.htm
Home Ventilating Institute, Bathroom Ventilation Guidelines: https://www.hvi.org/resources/publications/bathroom-ventilation/
International Residential Code, Section M1505, Exhaust Systems: https://codes.iccsafe.org/content/IRC2021P2/chapter-15-exhaust-systems
Rogawansamy S, Gaskin S, Taylor M, Pisaniello D. An Evaluation of Antifungal Agents for the Treatment of Fungal Contamination in Indoor Air Environments. Int J Environ Res Public Health. 2015;12(6):6319-6332: https://pmc.ncbi.nlm.nih.gov/articles/PMC4483703/
ANSI/IICRC S520 Standard for Professional Mold Remediation, Aramsco: https://blog.aramsco.com/mold-removal-and-remediation-what-it-means-to-follow-ansi/iicrc-s520-standards-to-achieve-source-removal